 I am not a morning person. When I'm left to my own devices (no pun intended), I won't be out of bed
until the sun is up. A few years ago a friend told me about an intriguing phone app.
You would set the alarm on your phone for the time you wanted to wake up in the morning. Then you would
place your phone face down on your bed while you slept. The phone would use its accelerometer to track
motion during the night, and infer your sleep cycle. It would then attempt to predict the best time to
wake you up in the 60 minutes prior to your alarm's set time. The idea is that it is eaiser to wake up
during a period of light sleep.
I am not a morning person. When I'm left to my own devices (no pun intended), I won't be out of bed
until the sun is up. A few years ago a friend told me about an intriguing phone app.
You would set the alarm on your phone for the time you wanted to wake up in the morning. Then you would
place your phone face down on your bed while you slept. The phone would use its accelerometer to track
motion during the night, and infer your sleep cycle. It would then attempt to predict the best time to
wake you up in the 60 minutes prior to your alarm's set time. The idea is that it is eaiser to wake up
during a period of light sleep.
The app actually worked quite well. However I read a number of articles indicating that sunlight is the
best method to lift you from a deep sleep cycle. Thus I came up with the idea for the Sun Clock.
It's not a new idea by any means. But the implementation sure is.
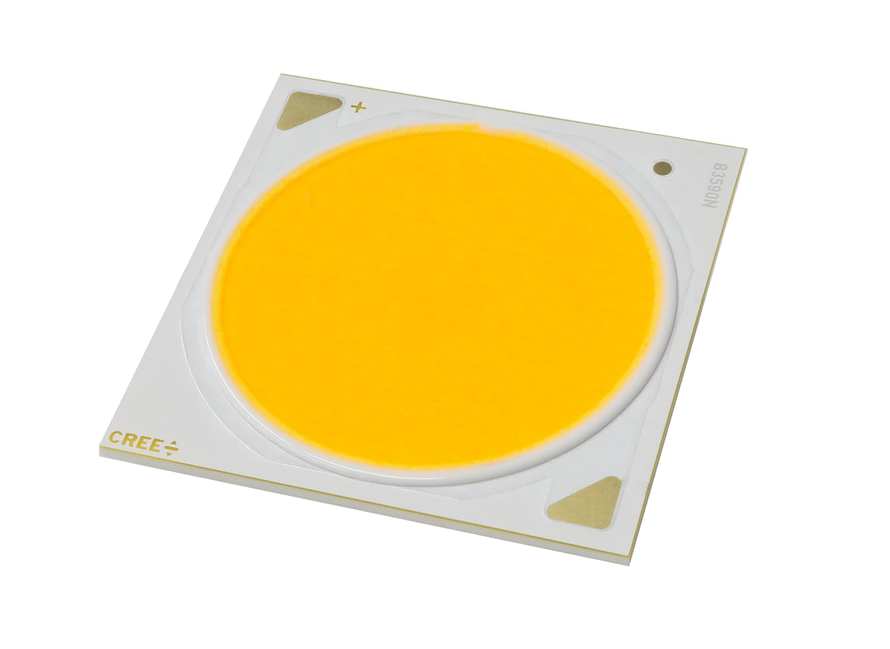
I was given a very high quality COB (Chip on Board) LED made by Cree. I've been told that these are increasingly
used in ceiling lighting in stores. Driving them is not too difficult; just apply a regulated current
at about 36 volts. The difficulty is in cooling them. At full power they are rated for over 100 watts,
and they put out about 15,000 lumens. That is equivalent to more than 15 incandescent bulbs. Usually they are attached to
a large aluminum heat sink and a fan, or an even larger heat sink without a fan.
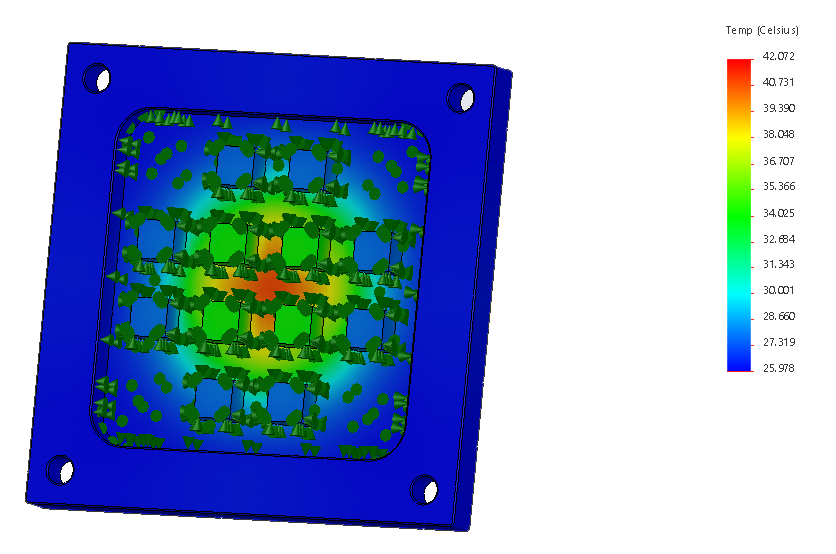
I thought it would be a good excuse to liquid cool it. The first step would be to design a liquid cooling block to
remove the heat. When I was undertaking this project, I had access to a manual mill as well as Solidworks Fluid and
Thermal Simulation tools. These proved to be crucial. I iteratively designed a small aluminum block with a silicone seal.
The back half had openings for hose barbs, and the front half had internal features to conduct the heat to a larger
surface area. To simulate its performance, I first ran fluid dynamics simulations to determine the coolant flow
path and factors such as turbulence and mixing speed. I was then able to apply the thermal properties of water
to determine the maximum temperature rise on the surface of the cooling block. In this case, optimization wasn't
strictly required, as it had no difficulties keeping the LED below the 60 degree Celcius limit. Below you can see a short
video of me CNC machining the bottom half of the water cooling block.
It needed a small DC fluid pump for the liquid. And it needed an LCD to set the time, and see the status. In true
scope creep style, I also wanted to add a few safety features to protect the rather expensive LED: a thermocouple
amplifier to measure the fluid temperature, and a flow wheel to verify that the pump is running. Additionally, I
added a wifi microcontroller (ESP8266) that could connect to my local wifi network. This would allow me to see the status
and change settings from my phone, anywhere in my apartment. To top it off, I added a rotary encoder + push button
to the interface, and a few smaller RGB LEDs under the fluid reservoir.
The fluid reservoir was made from a length of 2 inch acrylic tubing. Hand machined blocks sealed the ends, and provided
fittings for tubing. My coolant of choice turned out to be green automotive coolant, which is primary ethelyne glycol.
The RGB LEDs under the coolant added the nice effect that as the fluid got hot, the color of the LEDs would change from
green to red.
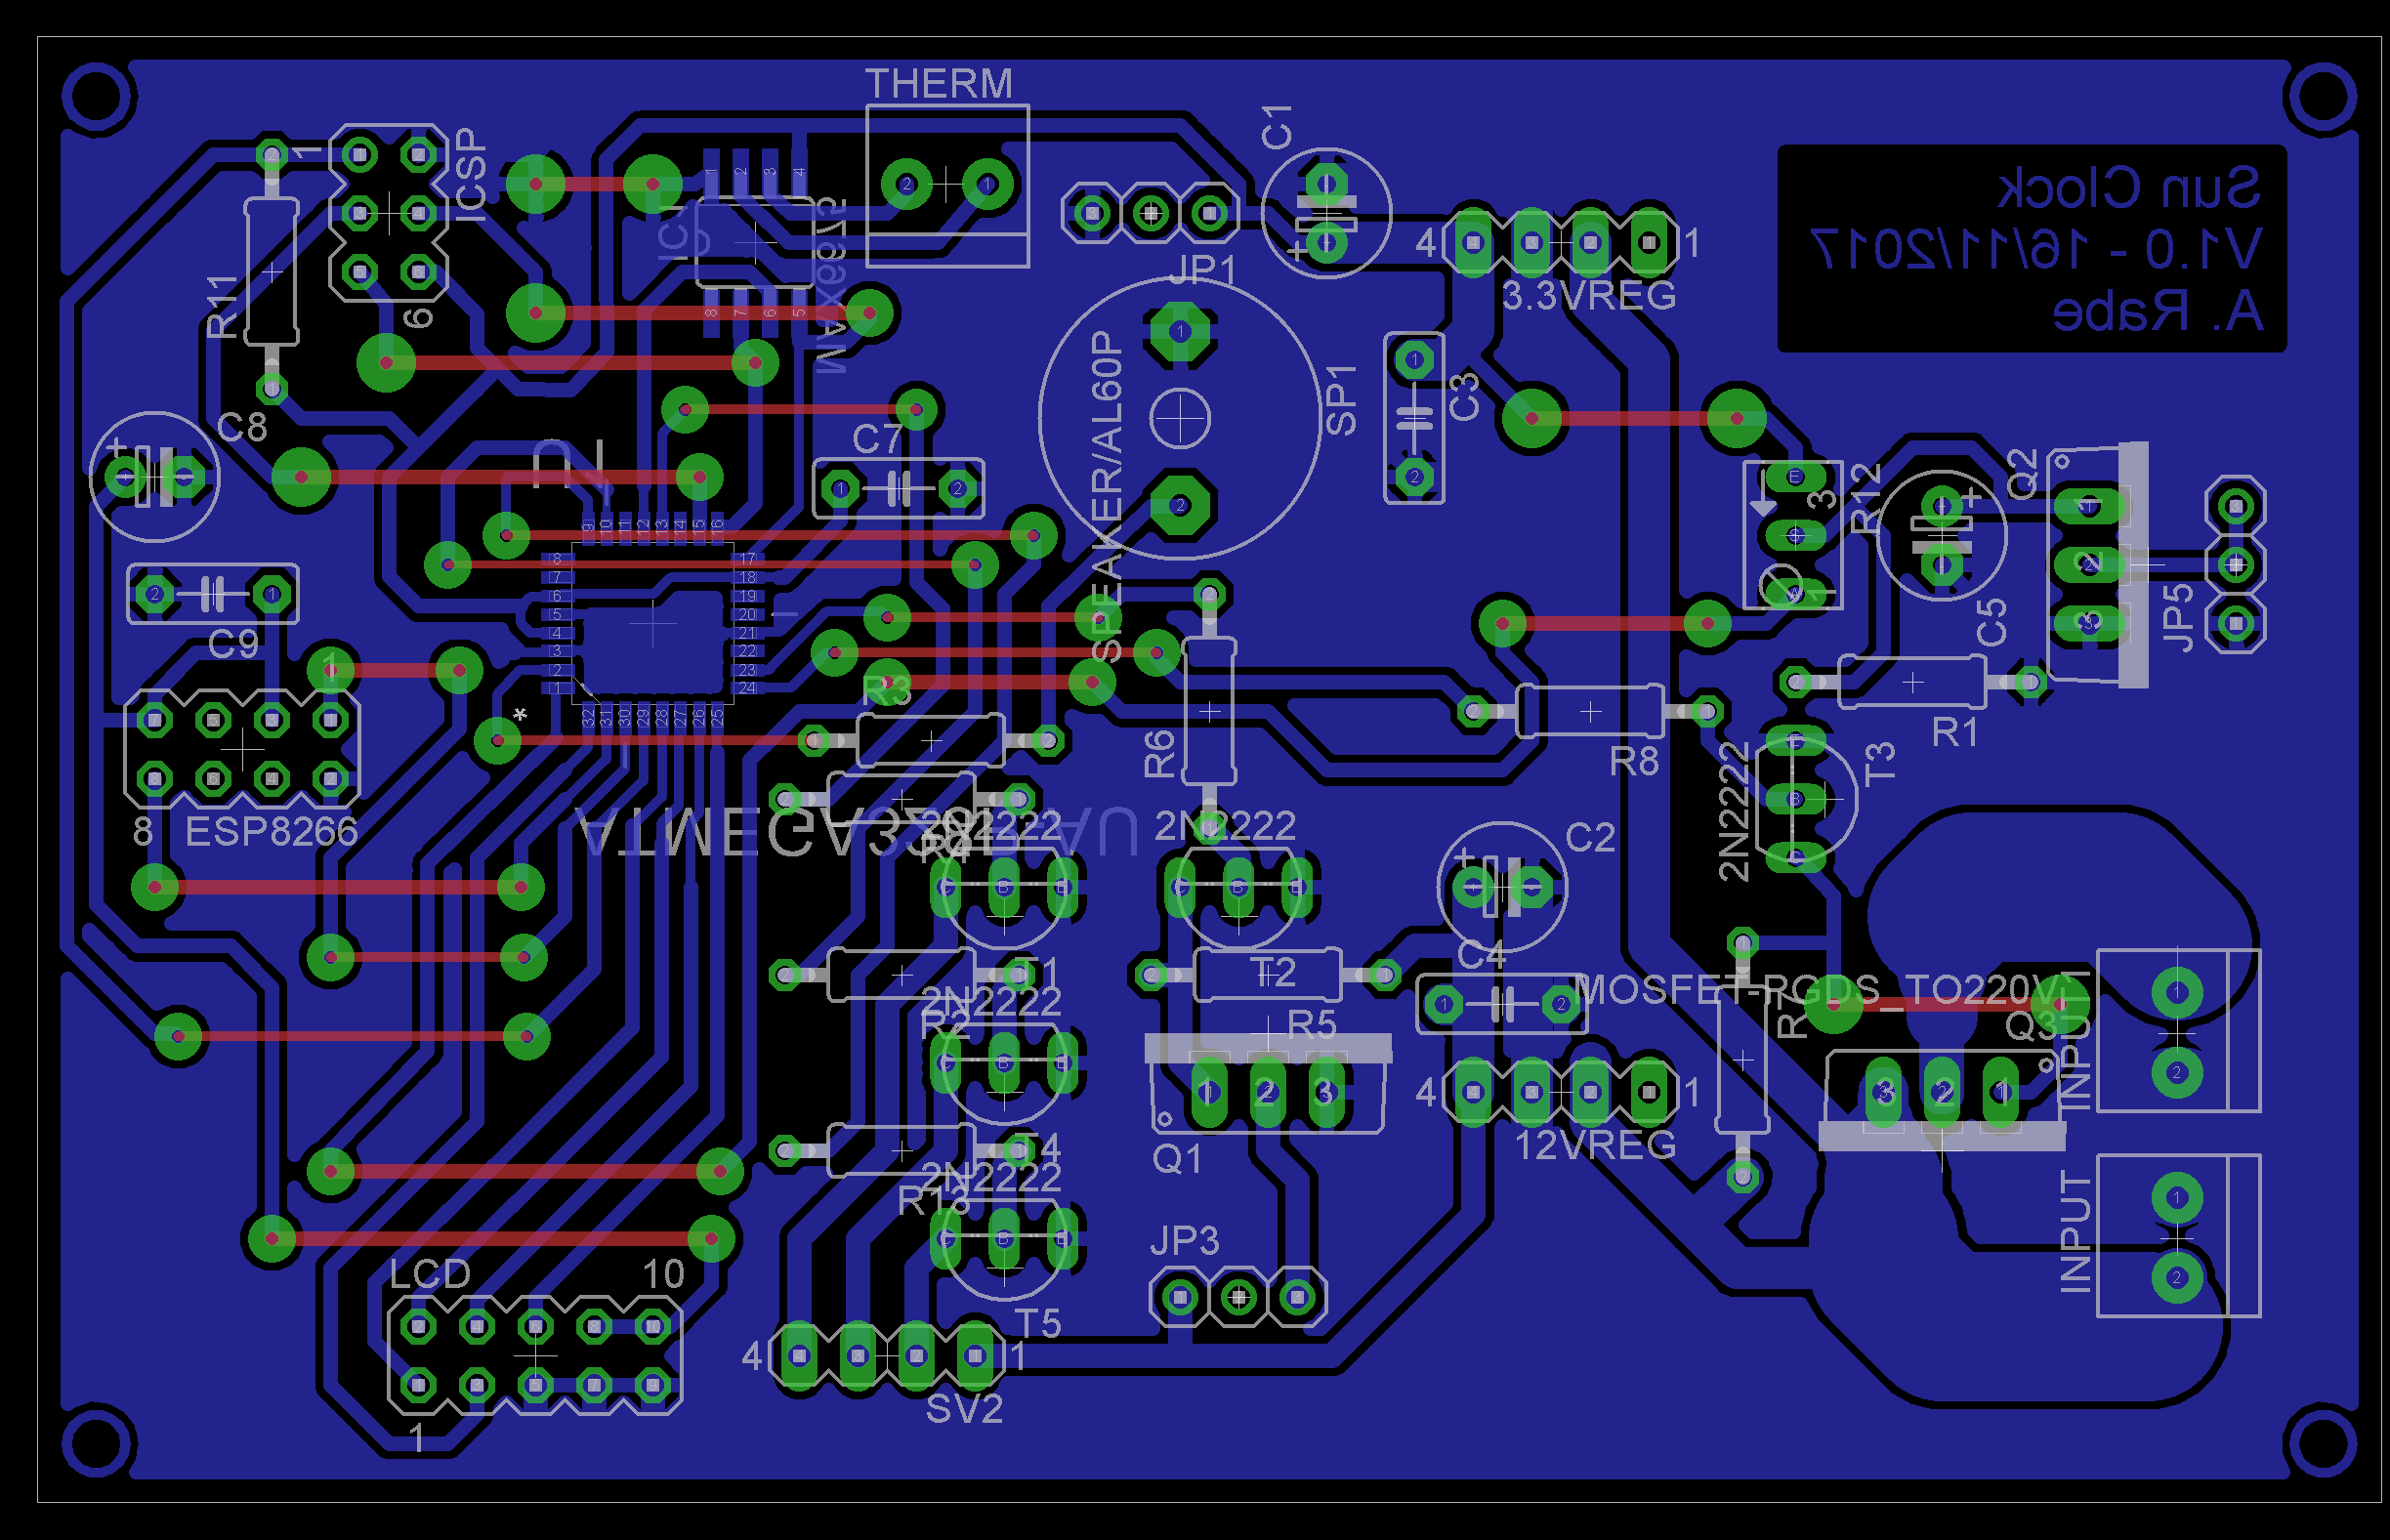
I designed my own custom PCB to hold the electronics. It centered around my favorite microcontroller, the Atmel Atmega328.
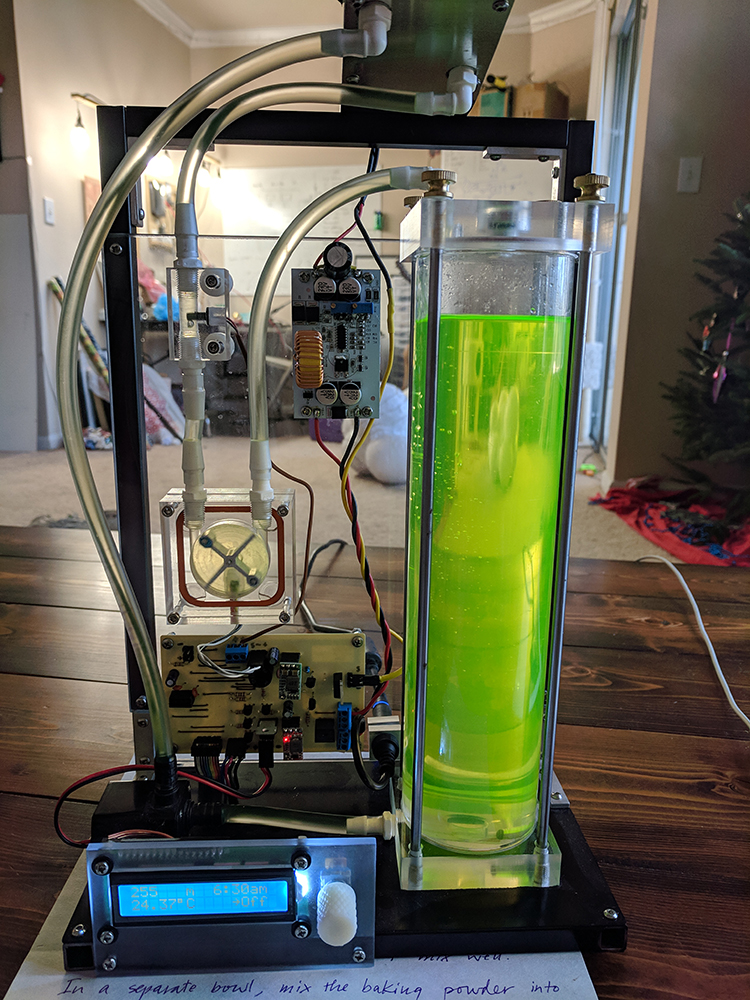
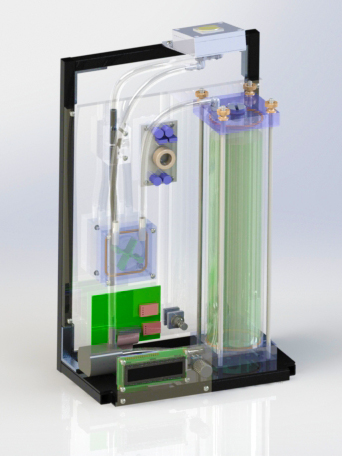
I wanted this project to look fairly finished and attractive (unlike most of my projects), so I machined the fittings
and mounting brackets by hand from aluminum and steel. I mounted it all to a painted steel frame. Of course, everything
was modeled in 3D, and rendered before I started any construction. One of the renderings can be seen below, at right, next
to a photo of the final device, at left.
It turned out that 15 lightbulbs' worth of light is actually extreme overkill (wow, who could have imagined). But it
does work very well to help me wake up during the winter months when it's still dark outside. I just limit it to 20%
of its maximum brightness.