 As an avid maker of mechanical devices, I often had a need for a 3D printer. Unfortunately when I
first started wanting a printer, even the “amateur” grade 3D printers such as the Maker Bot or the ‘RepRap’
were still too expensive for my needs. I had thought quite a bit about embarking on the (not uncommon) task
of building a so-called ‘RepStrap.‘ A RepStrap is a home-made printer cobbled together just well enough to
be able to print a more professional printer! Its name is fairly appropriate in that it ‘pulls itself up by
its bootstraps.’ In the end I (thankfully) decided not to compromise on the design of my own printer. It
turned out to be more capable and reliable than any desktop printer available.
As an avid maker of mechanical devices, I often had a need for a 3D printer. Unfortunately when I
first started wanting a printer, even the “amateur” grade 3D printers such as the Maker Bot or the ‘RepRap’
were still too expensive for my needs. I had thought quite a bit about embarking on the (not uncommon) task
of building a so-called ‘RepStrap.‘ A RepStrap is a home-made printer cobbled together just well enough to
be able to print a more professional printer! Its name is fairly appropriate in that it ‘pulls itself up by
its bootstraps.’ In the end I (thankfully) decided not to compromise on the design of my own printer. It
turned out to be more capable and reliable than any desktop printer available.
Below you can see a compilation of short clips that show the progress I was making on the firmware.
This project is one of the more involved projects I've ever undertaken. It took over a year to design,
working a bit here and there, and an additional six months to order parts and assemble it. Below is a
very preliminary concept design (done in Rhinoceros) for my RepStrap. The design changed many times
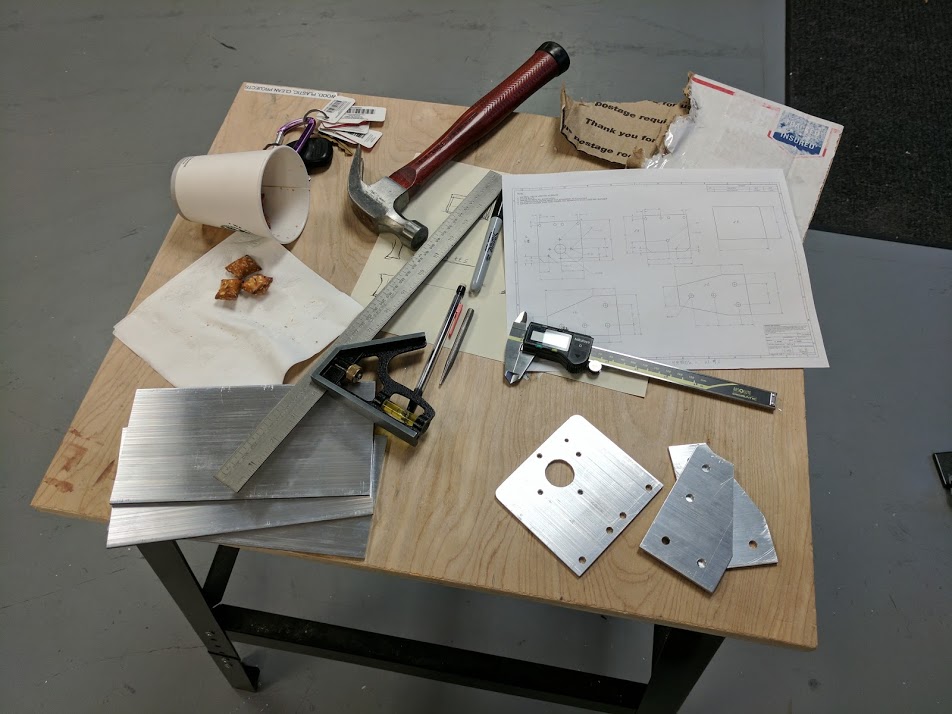 prior to when I actually started ordering parts. As you can imagine, the design of my projects is
heavily influenced by the tools I have available to me. The final design required a mill and lathe, tools
which have helped tremendously in later projects.
prior to when I actually started ordering parts. As you can imagine, the design of my projects is
heavily influenced by the tools I have available to me. The final design required a mill and lathe, tools
which have helped tremendously in later projects.
Although in theory a 3D printer is not a complex device, in practice there are many variables that must all
come together and work flawlessly to produce quality parts. Stepper motors are used to precisely control the
3 axes of motion and the extrusion of the plastic filament. The filament must be melted, of course, to be
extruded; however to produce quality prints, the temperature must be monitored precisely by parts that can
withstand 300ºC or more. And controlling all of these motors and a high power nozzle-heater, requires a set
of electronics smart enough to monitor all of these variables at once while at the same time reading and
processing the G-Code, and outputting motor steps at thousands of Hz. As you can see it is no small task to
build a machine to a really small-enough margin of error.
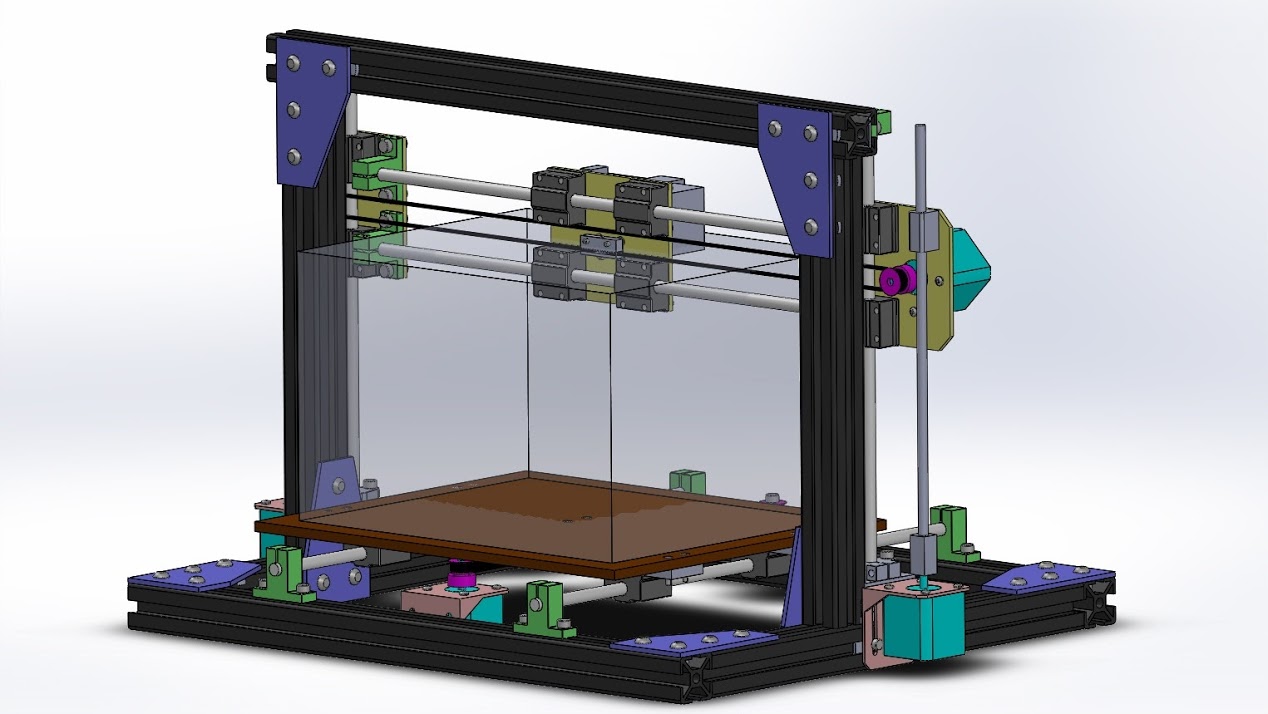
My design is entirely 30 mm aluminum extrusion based. From my past experiences with 3D printers, the
rigidity of the printer's frame is the dominant factor in good quality and repeatable prints. I even
shortened the length of the Z axis to increase its stiffness. This limits the flex of the vertical linear
bearing rods, and reduces ringing due to X axis acceleration, an effect that often shows up in less sturdy
printers such as the Prusa Mk3. The X and Y axes are driven by kevlar reinforced GT2 timing belts. The Z
axis uses 8 mm acme leadscrews. All of this allows for rapid acceleration which in turn results in shorter
print times, and high Z accuracy for layer thicknesses down to 100 microns. As with any printer, it took
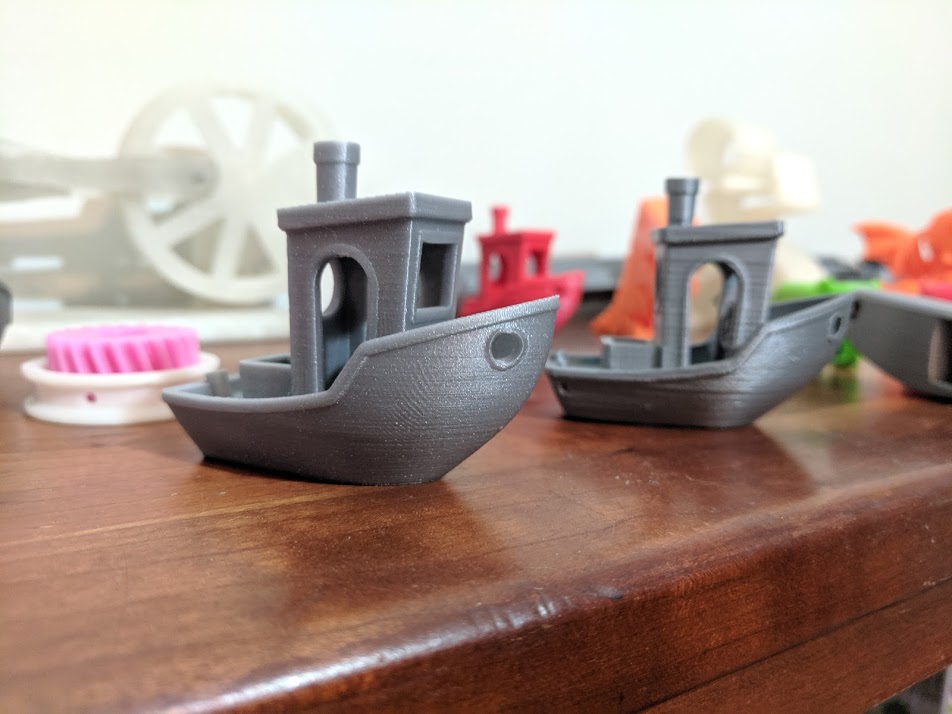
quite a bit of tuning the slicer settings to get the prints to turn out just right. On the left you can see
one of
the better Benchys that I was able to print.
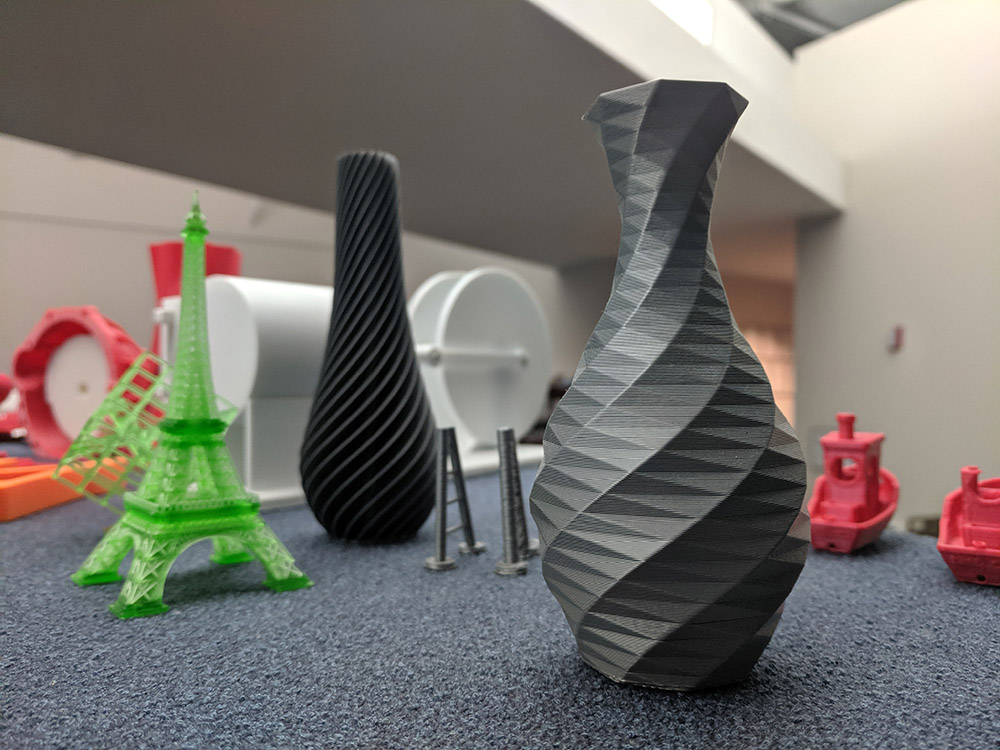
In vase mode, I have been able to push this printer to almost 300 mm/s with no loss in print quality. This
is far beyond what any sub $2000 printer can achieve, even though my printer cost less than any other
printer on the market (at the time that I made it).
Originally, I made my own custom driver PCB. And I was writing my own firmware. I wanted to undertake this
because of a specific feature that was not yet available in desktop printers: mesh bed leveling. This feature
probes the print bed at multiple locations and automatically adjusts the nozzle height to allow perfect
prints across the entire bed. About 8 months, and hundreds of pages of code into my custom firmware, a
version of the open source firmware Marlin was released. This new version contained this mesh bed leveling
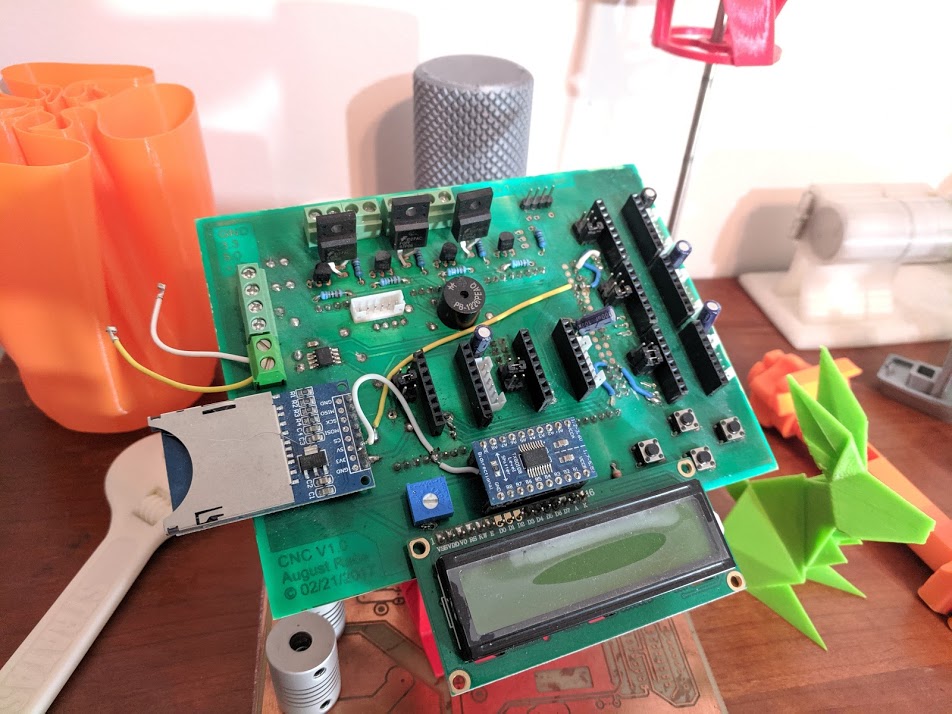 feature that I wanted. So I abandoned my custom code, and switched to using the very common RAMPS driver
board. This has been working flawlessly for multiple years now. You can see the original PCB I etched myself
below. I keep it only as a novelty.
feature that I wanted. So I abandoned my custom code, and switched to using the very common RAMPS driver
board. This has been working flawlessly for multiple years now. You can see the original PCB I etched myself
below. I keep it only as a novelty.
Although I spent a lot of time trying to get the design perfect on the first try, there are things that I
still would change. The low Z height of this printer (7 inches) is often a limitation. I knew that it would
be when I designed it. However I prioritized print quality over Z height. Ideally the linear rods would be
increased in size from 8 mm to 10 or even 12 mm. This would add quite a bit of stiffness to each axis,
allowing them to be longer while maintaining the good performance. 8 mm rods are common in cheap 3D
printers, and when I built this printer, I couldn't afford to spend three or four times as much on the less
common large diameter rods.
Additionally, a heated enclosure would benefit the print quality. It's not a huge issue when printing with
PLA, as PLA doesn't shrink much as it cools. However when printing in ABS or nylon, the prints warp quite a
bit as the layers cool. A heated enclosure would help to minimize this effect.
